Rehabilitation After Shoulder Instability Surgery: Timeline and Illustrated Exercises
A staged guide to wound care, icing, brace use, pendulum exercises, shoulder blade control, range of motion and strengthening after surgery for shoulder instability.
Key points
- Progress gradually under medical supervision, with the programme adapted to your recovery.
- During weeks 0–4, protect the shoulder and keep forward elevation and abduction below 90°.
- Behind-the-back stretching and wall climbs begin in week 6; assisted external rotation while lying down begins in week 7, with your surgeon’s approval.
- Strengthening starts in week 13 and progresses according to recovery.
For sports medicine conditions, diagnosis-related questions, or academic exchange, please contact Dr. Jiwu Chen.
Contact usBefore you begin
Rehabilitation after shoulder instability surgery should be tailored to the individual and supervised by a medical professional. The timings below describe this rehabilitation programme; follow your surgeon’s instructions for exercises, movement limits and brace adjustments.
Introduce exercises in stages. Stretch only to mild, tolerable discomfort, without forcing the shoulder to reach a target angle. Stay within the movement limits for your stage of recovery.
Wound care and stitch removal
Keep the wound clean and dry. Avoid getting it wet soon after surgery, including directing shower water onto it. Follow your clinical team’s advice on when to shower and how to protect the wound from water.
Dressings are usually changed every 2–3 days, with stitches removed at about 2 weeks. This can be done at the surgical clinic or a local hospital, depending on wound healing and your clinician’s instructions.
Icing
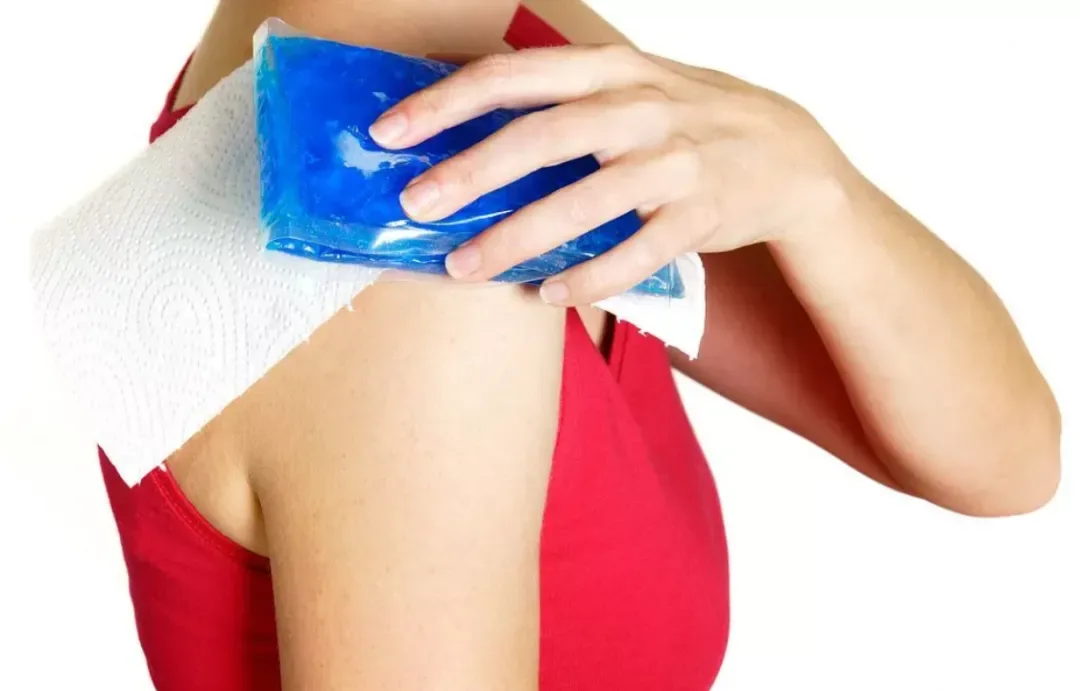
Icing can help reduce postoperative swelling and pain. Wrap an ice pack or frozen items in a clean, dry towel; do not place them directly on the skin.
Apply for no more than 15 minutes at a time, with at least 2 hours between applications.
There is no fixed end date for icing: it may continue as directed while swelling persists. It can also help with swelling or pain after rehabilitation exercises.
Using a shoulder brace
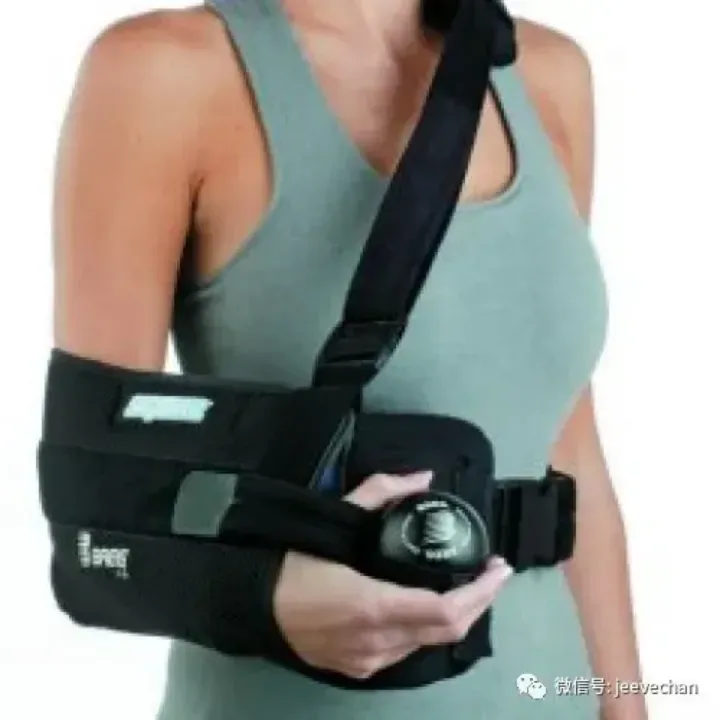
For the first 4 weeks, wear the brace during daily activities and sleep, and whenever possible when going out. Keep the operated forearm at your side, supported by the waist cushion as instructed.
Any adjustment, such as loosening the brace at home while keeping the waist cushion or using a pillow to support the arm at night, requires your surgeon’s approval.
Rehabilitation timeline
| Rehabilitation item | Weeks 0–4 | Weeks 4–6 | Weeks 7–12 | From week 13 |
|---|---|---|---|---|
| Icing | As directed for swelling | As needed after exercise | As needed after exercise | As needed after exercise |
| Brace | During daily activities and sleep | Intermittently, as instructed | Remove when authorised | Usually no longer needed |
| Forward elevation and abduction | Passive or assisted by the other arm; <90° | Gradually increase within permitted limits | Above shoulder height after 6 weeks if authorised | Continue |
| Supine assisted external rotation | Do not start yet | Do not start yet | Start in week 7 | Continue |
| Behind-the-back stretch and wall climbs | Do not start yet | Start in week 6 | Continue | Continue |
| Pendulums, elbow movement and shoulder rolls | Start in week 1 | Continue | Continue | Continue |
| Shoulder blade squeezes and shrugs | Start in week 1 | Continue | Continue | Continue |
| Resisted shoulder strengthening | Do not start yet | Do not start yet | Do not start yet | Begin gradually |
Start times are specified for each exercise. Progression and changes to brace use depend on recovery and your surgeon’s instructions.
Shoulder relaxation: from week 1
Pendulum exercises



Stand and lean forward, supporting yourself with the other hand on a table or wall. Relax the operated arm and let it hang, then make gentle circular, forward-and-back and side-to-side pendulum movements.
- From week 1: 2–3 sets a day, 10–15 repetitions per set.
Elbow bending and straightening

Make a fist, gently tighten the upper-arm muscles, and bend and straighten the elbow.
- From week 1: 2–3 sets a day, 10–20 repetitions per set.
Shoulder rolls

Relax the shoulder and gently move the shoulder girdle forwards, backwards, up and down. If movement is difficult, a family member may assist under professional guidance.
- From week 1: 2–3 sets a day, 10–20 repetitions per set.
Shoulder blade stability: from week 1
Shoulder blade squeezes

Lift your chest gently and draw your shoulder blades towards each other, feeling the muscles around them contract.
- From week 1: hold for 5 seconds, 10 repetitions per set, 3 sets a day.
Shoulder shrugs
Keep the operated arm slightly away from your body and gently raise the shoulder towards your ear, stopping at mild, tolerable discomfort.
- From week 1: hold for 5 seconds, 10 repetitions per set, 3 sets a day.

Shoulder range-of-motion exercises
Stick-assisted forward elevation
Use a rigid stick about 1.2–1.5 metres long. Keep the operated elbow straight and use the other hand to guide that arm forwards and upwards, within a tolerable range permitted by your surgeon.
- From week 1: 2–3 sets a day, 10–15 repetitions per set. During weeks 0–4, keep the arm below shoulder height and below 90°.

Stick-assisted abduction
Use a rigid stick about 1.2–1.5 metres long. Keep the operated elbow straight and use the other hand to guide that arm out to the side and upwards.
- From week 1: 2–3 sets a day, 10–15 repetitions per set. Stay below 90° during weeks 0–4; after 6 weeks, progress above shoulder height only as authorised.

Supine stick-assisted external rotation
Lie on your back with a rigid stick about 80–100 cm long. Keep the operated upper arm against your trunk and the elbow bent to 90°, holding the stick with your palms facing each other. Use the other hand to push the operated hand outwards, rotating the shoulder externally. Keep the upper arm close to your body and the elbow bent throughout. Gently reach the permitted range, hold for 3–5 seconds, then relax and return.
- From week 7: 2–3 sets a day, 10–15 repetitions per set.


Assisted behind-the-back internal rotation
Place a towel or resistance band behind your back, with the operated hand below and the other hand above. Gently use the upper hand to guide the operated hand upwards.
- From week 6: 2–3 sets a day, 10–15 repetitions per set.

Forward wall climb
Face the wall, place your palm on it with the elbow bent, and slowly walk your fingers upwards. Step closer to the wall as your hand rises, staying within your tolerated and permitted range.
- From week 6: hold for 5 seconds, 10 repetitions per set, 3 sets a day.

Sideways wall climb
Stand with the operated side towards the wall. Place your palm on it with the elbow bent and slowly walk your fingers upwards, moving closer as your hand rises.
- From week 6: hold for 5 seconds, 10 repetitions per set, 3 sets a day.
Shoulder strengthening: from week 13
Strengthening covers forward elevation, abduction, internal rotation and external rotation. Use small dumbbells, water bottles or resistance bands, beginning in week 13 and progressing according to your strength.
Resisted forward elevation
Holding a small dumbbell or water bottle, slowly raise the arm forwards to shoulder height. Hold for 3–5 seconds, then lower slowly.
- From week 13: progress gradually according to your strength and your clinician’s instructions.

Resisted abduction
Holding a small dumbbell or water bottle, slowly raise the arm outwards and slightly forwards to shoulder height. Hold for 3–5 seconds, then lower slowly.
- From week 13: progress gradually according to your strength and your clinician’s instructions.


Resistance-band internal rotation
Keep the elbow close to your trunk and slowly move the forearm inwards, rotating the shoulder internally against the band’s resistance.
- From week 13: progress gradually according to your strength and your clinician’s instructions.

Resistance-band external rotation
Keep the elbow close to your trunk and slowly move the forearm outwards, rotating the shoulder externally against the band’s resistance.
- From week 13: progress gradually according to your strength and your clinician’s instructions.
All content is for medical education only and cannot replace an in-person medical evaluation or an individualized treatment plan.
Further reading
Related articles
Shoulder rehabilitation
Rehabilitation after reverse total shoulder arthroplasty: a phase-by-phase guide
Rehabilitation after reverse total shoulder arthroplasty must balance wound care, implant protection, recovery of motion, and progressive deltoid and periscapular training. This illustrated guide explains common exercises and safety precautions from the first postoperative week through week 12 and beyond.
Read articleShoulder rehabilitation
Rehabilitation After Shoulder Debridement, Capsular Release and Acromioplasty
Wound care, brace use, range-of-motion exercises and strengthening after shoulder debridement, capsular release and acromioplasty, with procedure-specific starting times and rehabilitation schedules.
Read articleShoulder rehabilitation
Rehabilitation after pectoralis major tendon repair: sling protection, shoulder exercises, and return to sport
Rehabilitation after pectoralis major tendon repair: wound care, icing, brace use, staged movement and strengthening exercises, and return to sport.
Read articleReferences
Patient Q&A
Frequently asked questions
What is posterior shoulder instability? How to manage posterior shoulder pain after bench pressing or impact?
Posterior shoulder instability often occurs during heavy bench pressing, rugby blocking, or falling forward with an outstretched hand, presenting as deep posterior shoulder pain and a feeling of instability, possibly accompanied by reverse Bankart lesions or posterior capsule laxity. Mild instability is best managed by strengthening the posterior rotator cuff (infraspinatus, teres minor) and scapular muscles. If conservative treatment for 3-6 months is ineffective and there is a clear posterior labral tear or bone defect, arthroscopic posterior labral repair and capsular plication may be considered.
Why might recurrent shoulder dislocation require surgery?
Repeated dislocations may damage the labrum, ligaments, or bone. Surgery can repair or reconstruct stabilising structures, but the decision also depends on recurrence, age, and sporting goals.
What are the advantages of percutaneous minimally invasive repair compared to traditional open surgery for acute Achilles tendon ruptures?
Traditional open surgery involves a longer incision (about 6-10cm), and due to poor blood supply in the posterior heel area, there is a higher risk of postoperative wound edge necrosis, infection, and sinus formation. Percutaneous minimally invasive repair (such as the Percutaneous Achillon technique) requires only a few small incisions of several millimeters, significantly reducing soft tissue dissection and trauma, lowering the rate of soft tissue complications, and providing sufficient biomechanical fixation strength to support early weight-bearing and passive ankle joint movement.
Contact
Contact us
Inquiry Received
Your message and attachments have been received.